You can face some real challenges when you want to export and import WordPress posts with featured images as featured images are not exported by default. The default way of exporting WordPress posts only exports the text and formatting but not the featured images or any other related media. This is an issue because most of the websites have posts that contain featured images along with other media attachments. Now you may be thinking how can you export and import WordPress posts with featured images? Well, you are in the right place because in this post we will show you how to import and export WordPress posts with featured images using a plugin and a WordPress built-in tool (WordPress Import tool).
How to Export and Import WordPress posts with featured images
There are simple steps that will help and guide you on how to move WordPress Posts with featured images with the help of a plugin. And then import the posts with featured images following their correct targets on the destination website. It is always advised to have a backup of your website before you start importing a huge number of new posts to the website. (For safety purposes)
- First, you will need to install and activate a plugin named “Export Media with Selected Content” to the website you want the content from. If you are a new WordPress user and want to learn how to properly install a plugin, read our complete guide about How to install a plugin in WordPress.
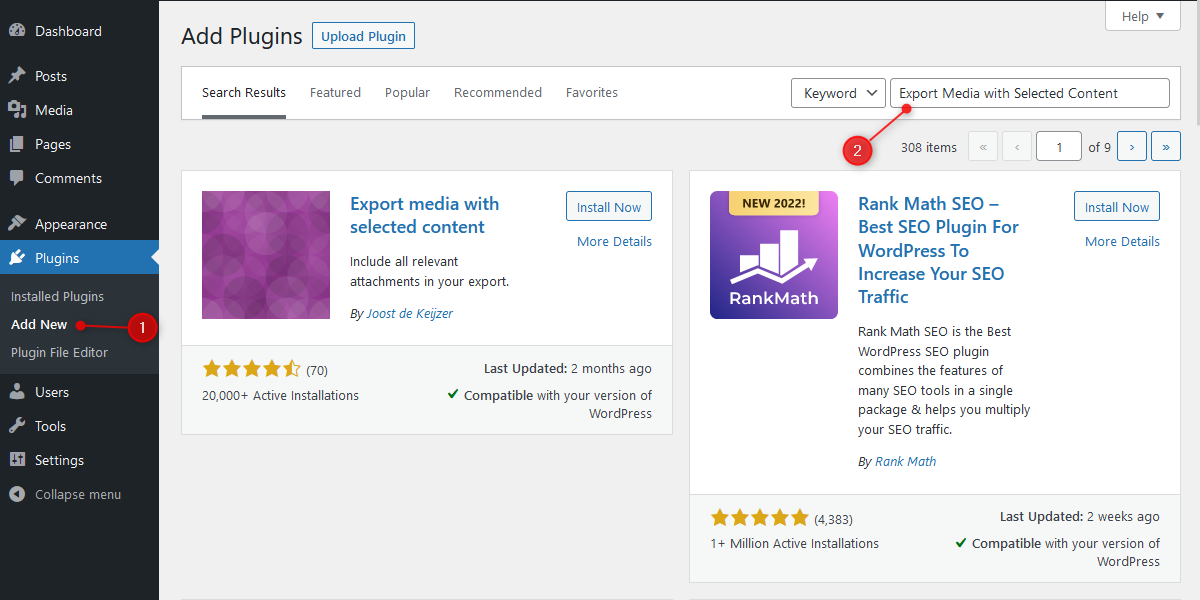
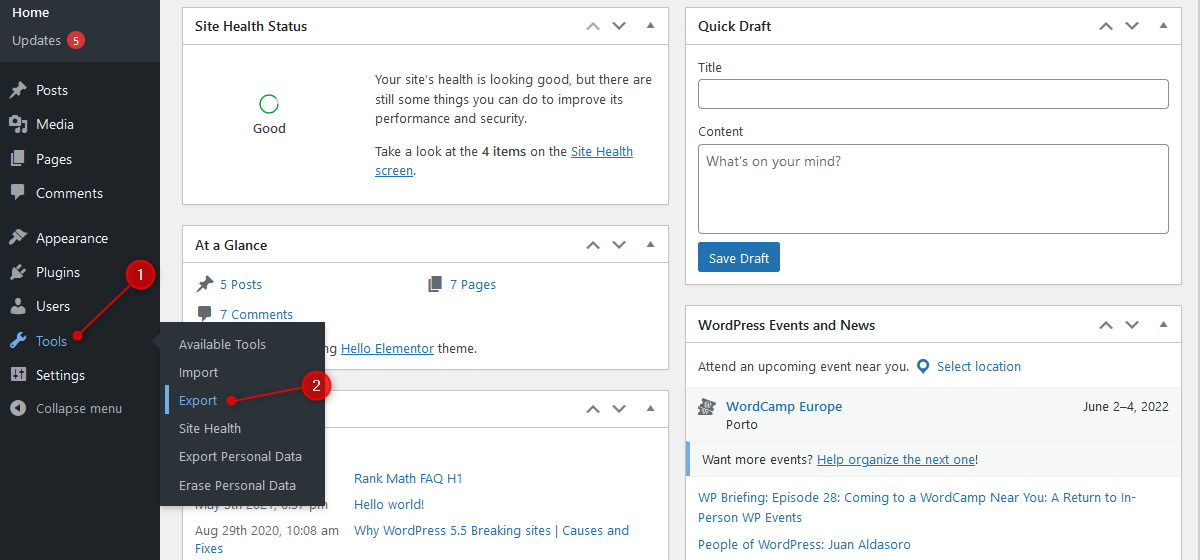
- After the plugin “Export Media with Selected Content” is installed and activated go to the “Tools” section and click “Export” (Tools > Export) in your WordPress admin area.
- Select the content type that you want to export from your website e.g. Posts. Don’t forget to select the option that is saying “Export media with selected Content” at the bottom because if you didn’t select this option then featured images and any other media will not get exported. After that click on the “Download Export File” button and an XML file will be downloaded to your computer.
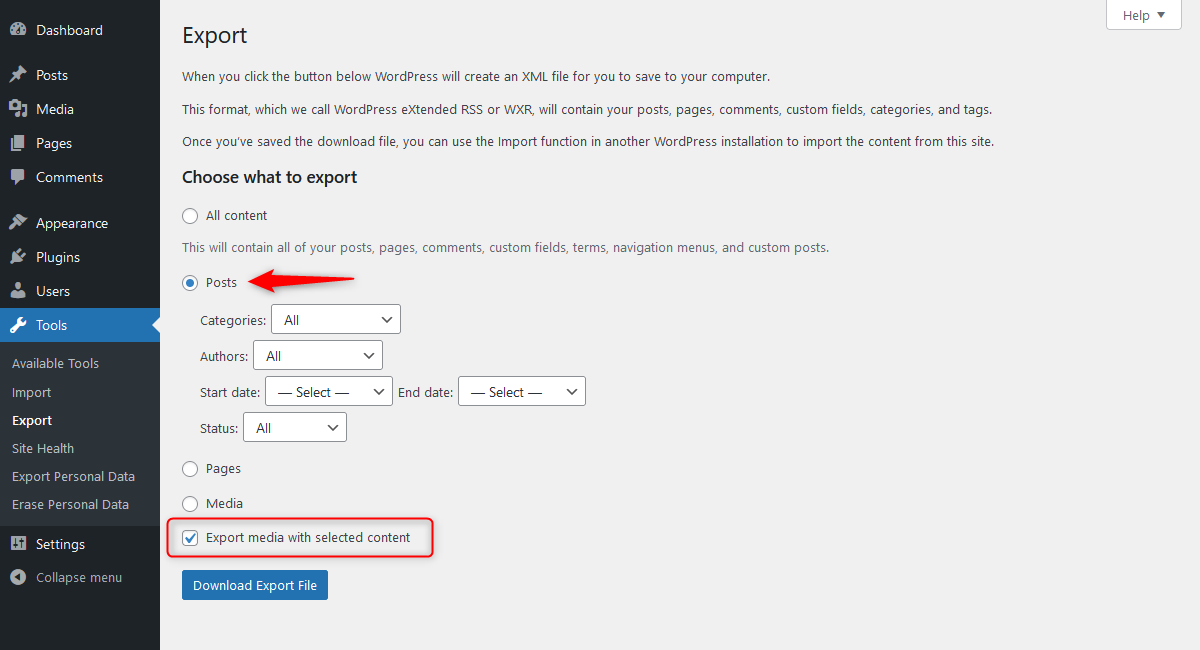 Tip: If your content is too large, we recommend you split your content into smaller chunks like you can split your content based on the categories, authors, date and status type. This way you can avoid overloading your server and 503 server error.
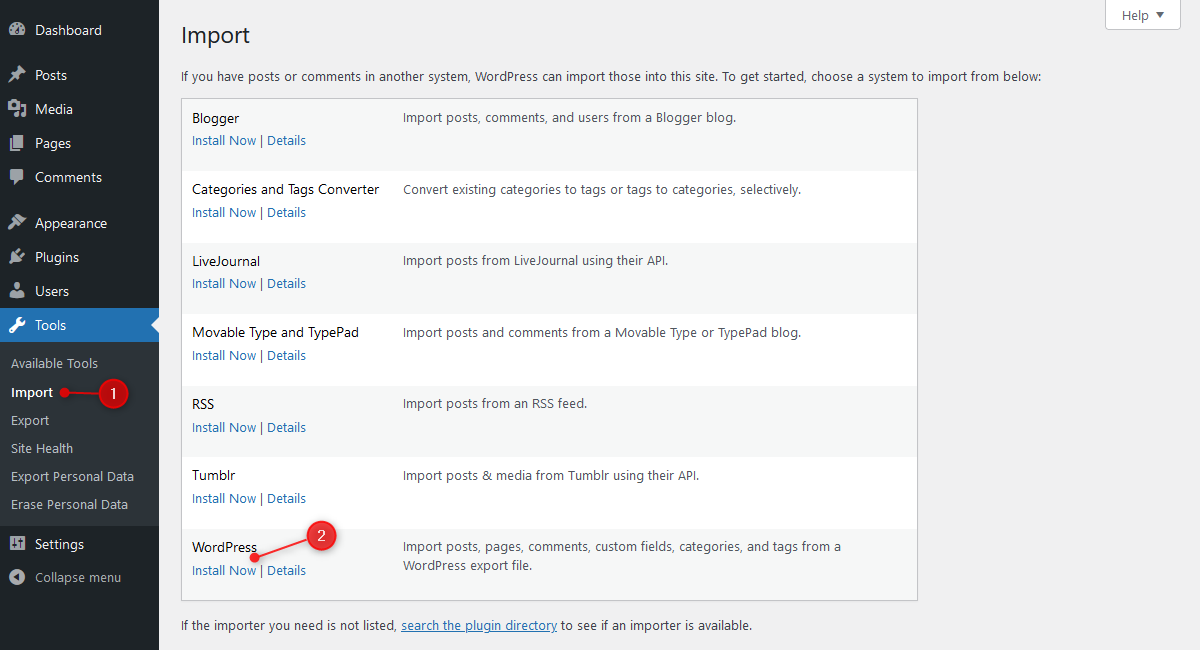
 - Now go to the website where you want to import the downloaded content. Go to the “Tools” section and click “Import” (Tools > Import). As we will use WordPress’ built-in import functionality so, we will have to install it first. For that click on the “Install Now” link under WordPress. After clicking this, a plugin will start to install that will help to import the content from other site. After the installation click on “Run Importer”.
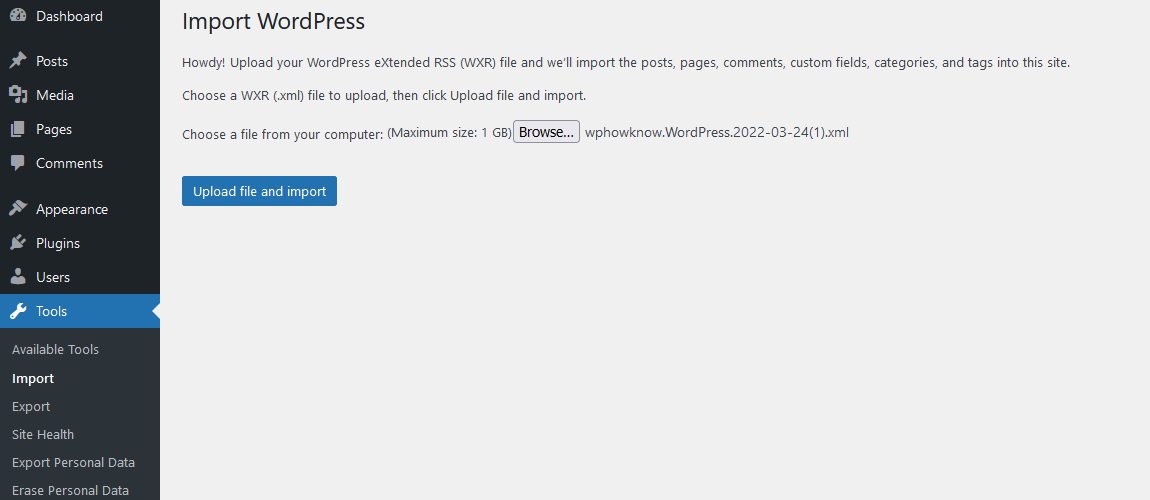
- Now select the exported XML file you just downloaded from the previous site and click on the “Upload file and Import” button to upload it.
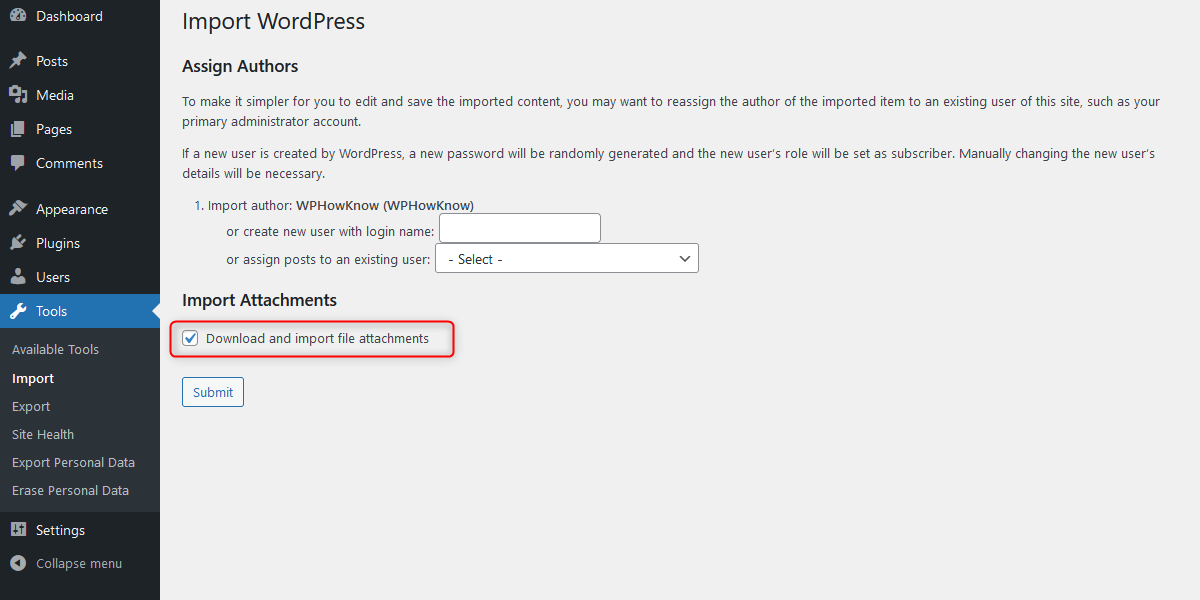
- In this step, you will have to assign an author to the posts that are being imported. You can either create a new author and assign the posts to this newly created author or you can select an existing author. After assigning the author, select the option “Download and import file attachments” and click on the “Submit” button.
- Once the process is completed, all the posts are successfully imported to your website along with the featured images and any attachments.

Conclusion
It is very easy to export and import the posts with featured images and attachments from the old website to the new one. You just need to download the posts in XML format from the previous website through a plugin called “Export Media with Selected Content” and then import the downloaded file to the destination website. A WordPress built-in importer plugin will help you to import the downloaded content for you in a little amount of time.
Want to get WordPress and Web Hosting related video tutorials? Subscribe now to our YouTube channel. You can also follow us on Twitter and Facebook to get more tutorials, tips, How to guides, reviews and much more about WordPress and Web Hosting.
Frequently Asked Questions (FAQ’s)
By default, WordPress export does not include any images or media attachments. However, you can export posts or pages with images using a plugin named “Export media with selected content”.
By default, WordPress export does not export featured images which is why you will not be able to see the featured image on the new website. However, you can export content with featured images using a plugin named “Export media with selected content”.
To export the posts from WordPress, you need to go to the source website. Then you have to go to the tools section from the dashboard. Click on “Export” and select “Posts” then download the XML file. In case you want to export featured images and other media, it is better to install a plugin called “Export media with selected content”. After downloading the file, you can import it to any other website. The import will be done through the WordPress importer plugin.
1- Go the source site and log in to dashboard
2- Go to tools > Export.
3- Select what you want to export. In this case select “Posts” only. This will only download the posts and no featured images will be exported along with the post by default.
4- Download the file by clicking on Export File.
Go to WordPress Admin page > Tools > Import. Click on “Run Importer”. Then click on “Choose File” and select the Media XML file to upload.
Excellent post!
Thank you!