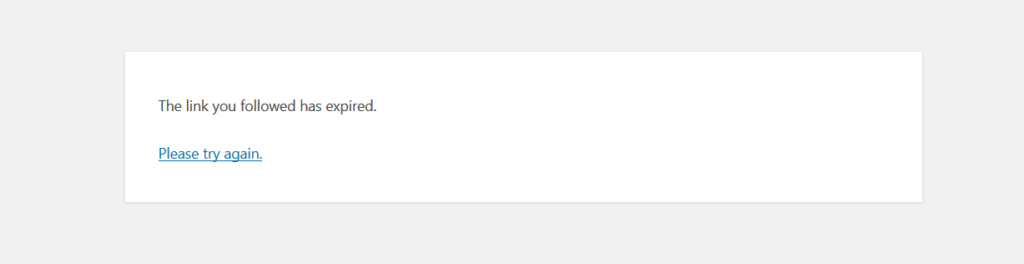
If you’ve landed on this article, it means you’re facing difficulty in uploading media files to your WordPress website and seeing looking for a quick fix. When a user tries to upload an image or any other media that exceeds the pre-defined limit, WordPress shows frustrating errors like “File exceeds the maximum upload size for this site” or “The link you followed has expired“. In this article, you’ll learn complete steps to increase the upload file size limit in WordPress using a plugin.

Here is a complete video tutorial on “How to Increase Maximum Upload File Size in WordPress using a plugin”.
If you are a reading person, please continue reading.
By default, most of the web hosting provides a max upload file size ranging from 2MB to 128MB and it is fairly enough if you just want to upload images or other small media files to your website.
Let’s see how you can check the max upload file size on your website.
How to check Maximum Upload file size limit on a WordPress website
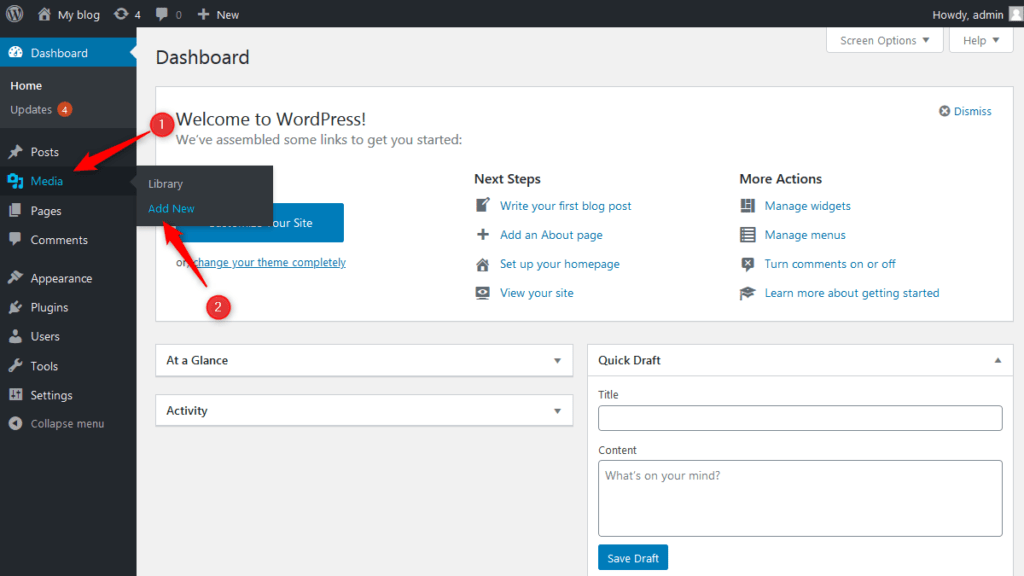
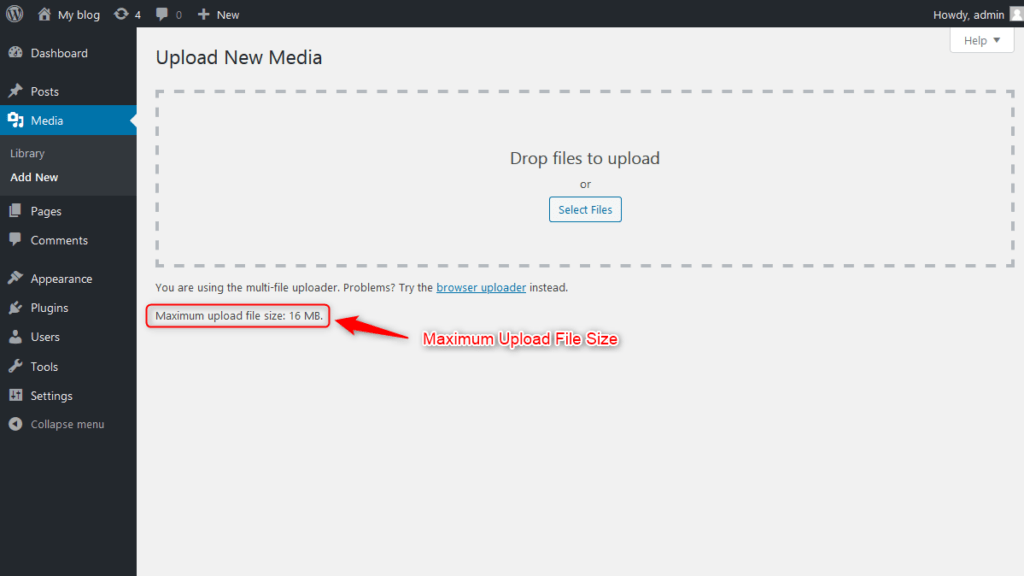
To check the upload file size limit on your WordPress website go to WordPress Dashboard » Media » Add New.
Here you’ll see max upload file size limit for your website.
Ways to Increase Max Upload File Size
There are different ways to increase upload file size limit in WordPress like editing WordPress wp-config.php file, make changes to .htacess file or editing php.ini file but if you are a beginner or don’t want to edit files then installing and using a plugin is the best option for you.
How to Increase Max Upload File Size Limit Using a Plugin
To increase max upload file size limit on the WordPress website, we will use a plugin called “Increase Maximum Upload File Size”.
First, install the plugin using the method mentioned below:
- Go to Plugins within your Dashboard and click on Add New.
- Search for “Increase Maximum Upload File Size” in the plugins search bar.
- Click on “Install Now” and after installation click on “Activate“.

Now to increase max upload file size limit, in the “Settings” section click on “Increase Maximum Upload Size” and it will take you to the plugin’s Settings page.
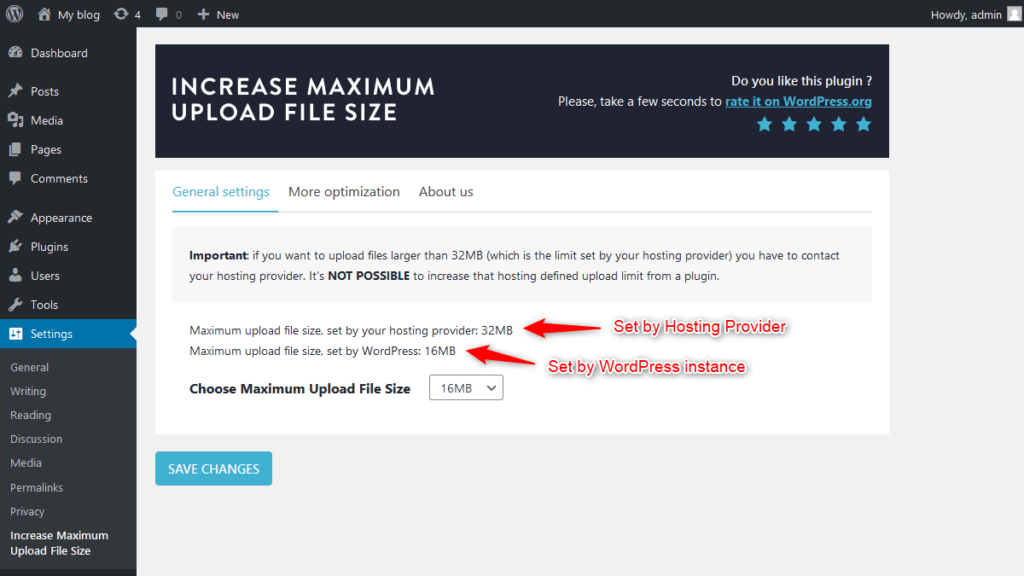
Here you will see upload file size limits set by your web hosting provider and WordPress.
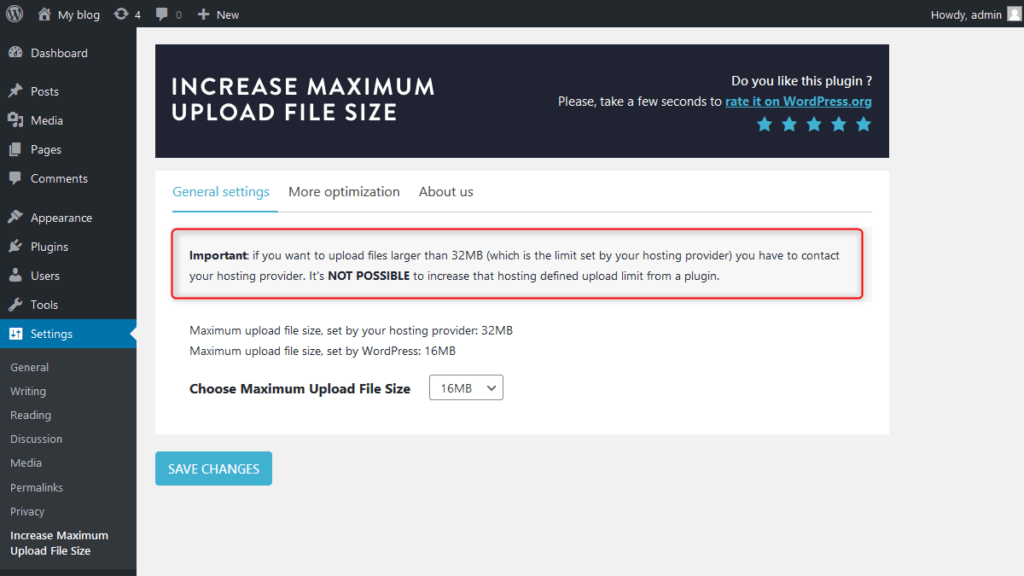
Note: You cannot increase the pre-defined upload limit set by your web hosting using a plugin. However, if you want to increase it beyond pre-defined upload limit, you will need to contact your web hosting provider. See below image.
Now from the drop-down menu, select maximum upload file size and it should not be higher than the limit set by your hosting server.
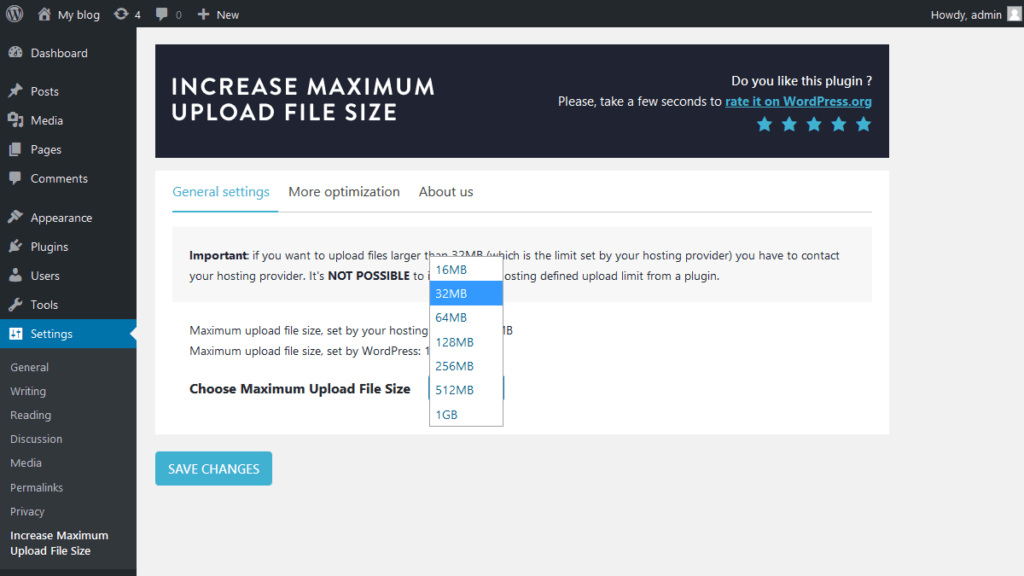
After choosing the max upload file size from the drop-down menu, click on the “Save Changes” button to save your settings.
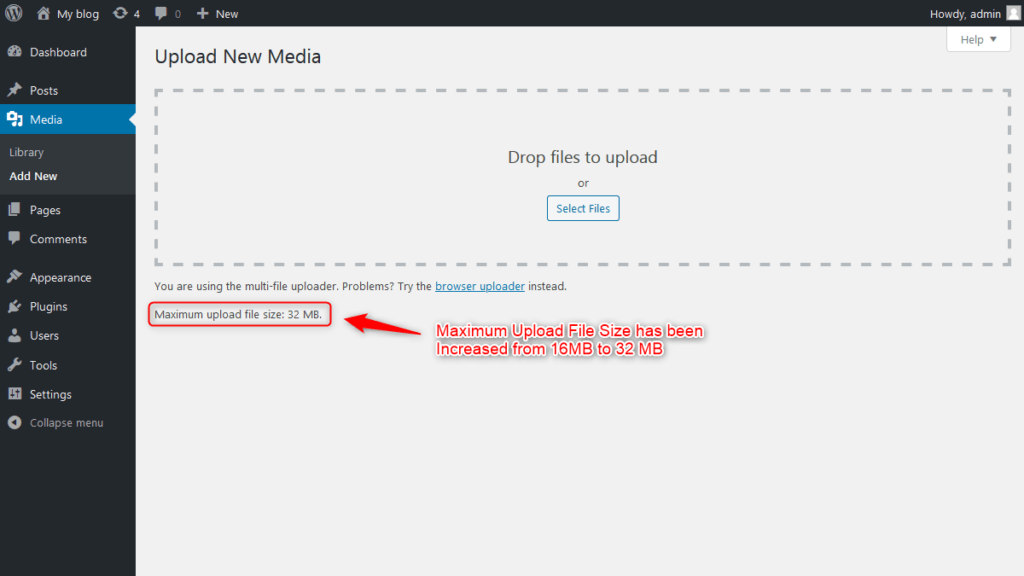
Now again go to the “Media” section to check if the upload file size limit has been increased or not.
If this method works for you, let us know in the comments section below. Looking for the plugin that can hide all traces of block-based editor? Click here.
For WordPress Video Tutorials subscribe us on YouTube. You can also find us on Twitter and Facebook.