After the release of WordPress 3.7, automatic updates have been enabled by default for minor WordPress updates (which include things like maintenance, stability, and security enhancements). But for major upgrades, you need to manually update WordPress via dashboard or FTP client manually.
In this step by step guide, we will show you how to update WordPress manually using two methods.
Here are the points that we will cover in this article.
First let’s see why it is important to upgrade WordPress to the newer version.
Why Update WordPress?
Are you aware of the fact that outdated themes, plugins and WordPress core can result in getting WordPress websites hacked. Why? Because, hackers can exploit security vulnerabilities in outdated version and can gain access your website. So, it is essential to upgrade to the latest version. Also, WordPress update is essential for best speed, performance and compatibility.
One more thing before you upgrade WordPress to current version, don’t forget to take below mentioned precautions before manually upgrading WordPress.
Precautions to take Before Updating WordPress
Before upgrading to the new version, you must take below mentioned precautionary measures to avoid any inconvenience.
- Create Website Backup
- Update Plugins and Themes
- Deactivate Caching Plugins
Let’s have a look into steps necessary before the manual update. Read on till the end to update WordPress manually to the latest version.
-
- Create a Backup of Your WordPress Website
Before WordPress update, create a complete backup of your website. This includes the backup of WordPress database, themes and plugins, media uploads (images/videos), and WordPress core files. In case if something went wrong, you can restore your website using that backup. You can also use a third-party plugin to create a complete backup of your WordPress website. - Update Plugins and Themes
Before updating WordPress, it is essential to update themes and plugins. Why? Because the already installed themes or plugins might not be compatible with the updated WordPress version and may cause your website to crash. - Deactivate Caching Plugins
If you are using a cache plugin, for instance (W3 Total Cache or WP Fastest Cache), it is recommended to deactivate it before updating the WordPress website. So, that cached maintenance pages do not interfere with the WordPress update process.
- Create a Backup of Your WordPress Website
How to Update WordPress To the Latest Version
Now let’s have a look into methods of updating the WordPress website manually. In this step by step guide, we will show you how to manually update WordPress to the new version. Keep your site up to date by below mentioned quick methods.
1st Method: Upgrade WordPress from Dashboard | For Beginners
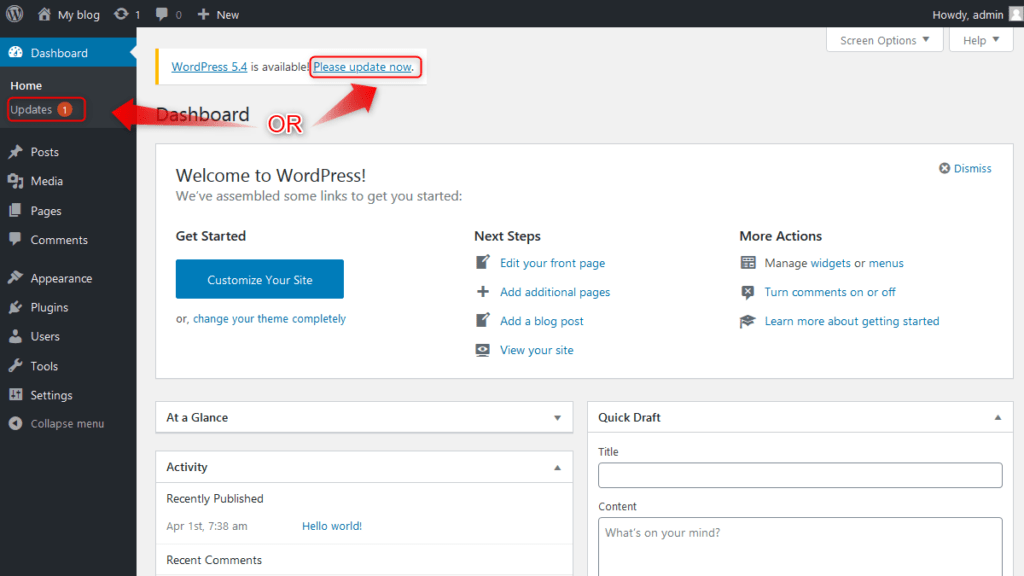
After taking the necessary precautions mentioned above, now it’s time to upgrade WordPress to the latest version. Login to your WordPress admin area. When a major update is available for WordPress, you’ll see a notification at the top of the dashboard. Either click on the “Please update now” button or the “Updates” under the “Dashboard” section to get to the Updates screen.
If you don’t see update notice or update screen is not showing the option to update to the current version, but you know there is a new version of WordPress available, click “Check Again” and let the page refresh. After refresh when the update appears, click “Update Now“ button to upgrade WordPress. WordPress will install the latest version and will put your site in maintenance mode during the updating process.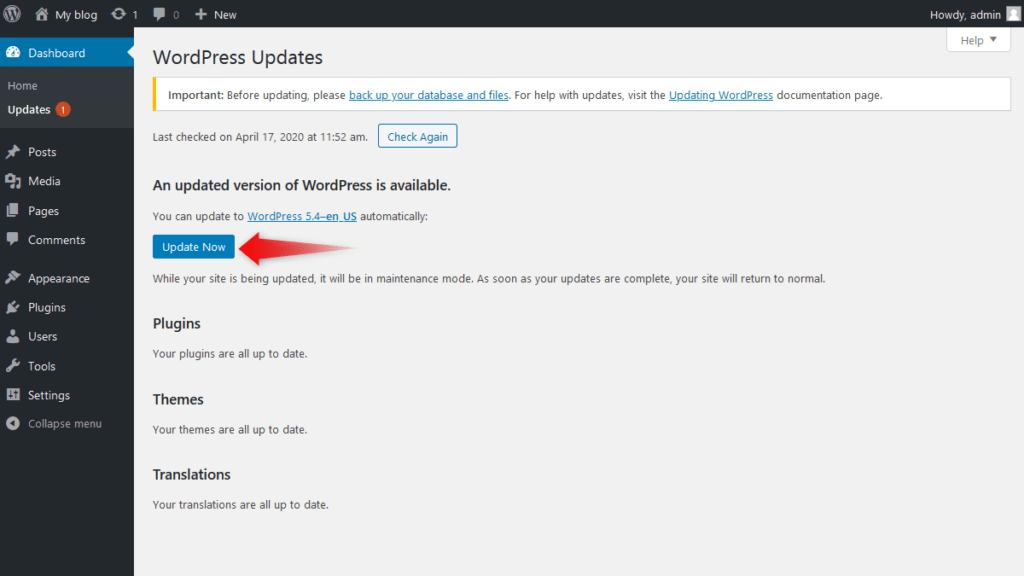 Once WordPress update is done, you’ll see the WordPress welcome screen confirming that you’ve updated WordPress successfully. That’s all.
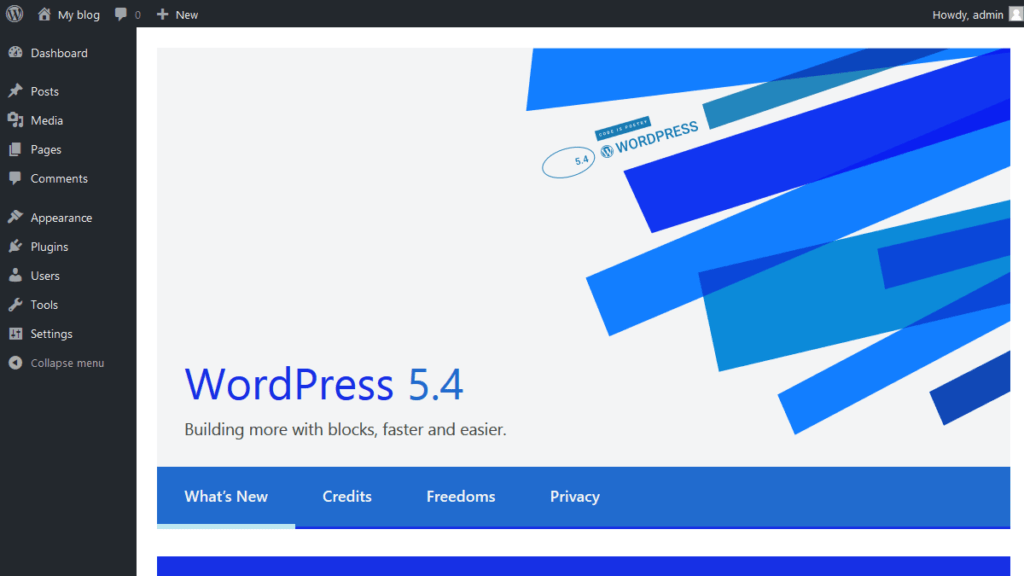 Now go to your site to check if everything is appearing correctly.
Want to know what new features are added in WordPress 5.4? Click here.
2nd Method: Manually Update WordPress Using FTP
Why you need to update WordPress manually via FTP? This could be due to various reasons, for instance, you cannot access your dashboard, your site has gone down, or a previous automatic update failed, etc.
Note: Before updating WordPress manually using FTP create the website backup, update themes and plugins, and deactivate the cache plugin as mentioned above.
Follow the step by step complete guide to update WordPress manually on your hosting server using FTP.
- The first step is to download the current updated WordPress version. To get that go to the WordPress download page and download the latest version of WordPress.
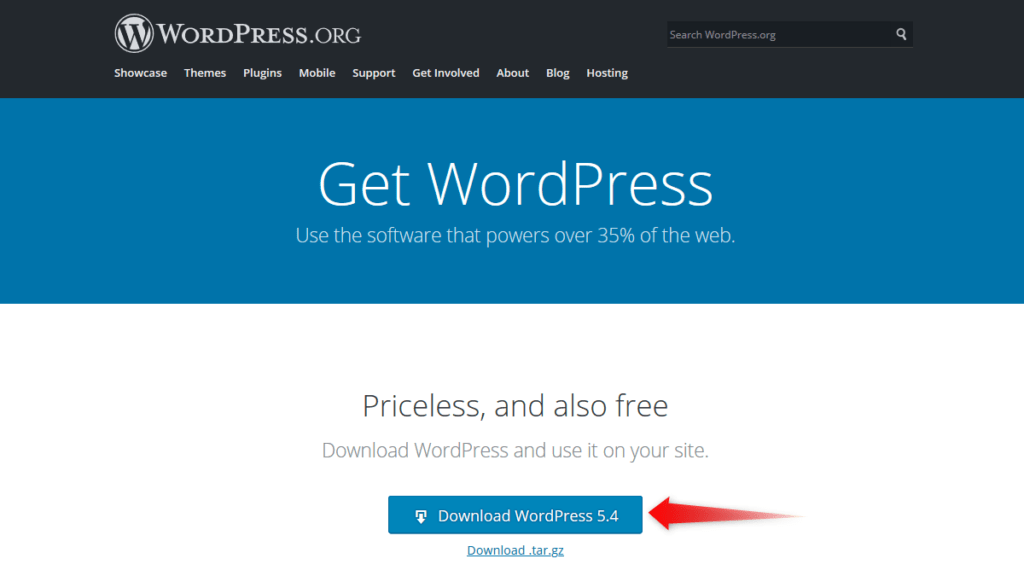
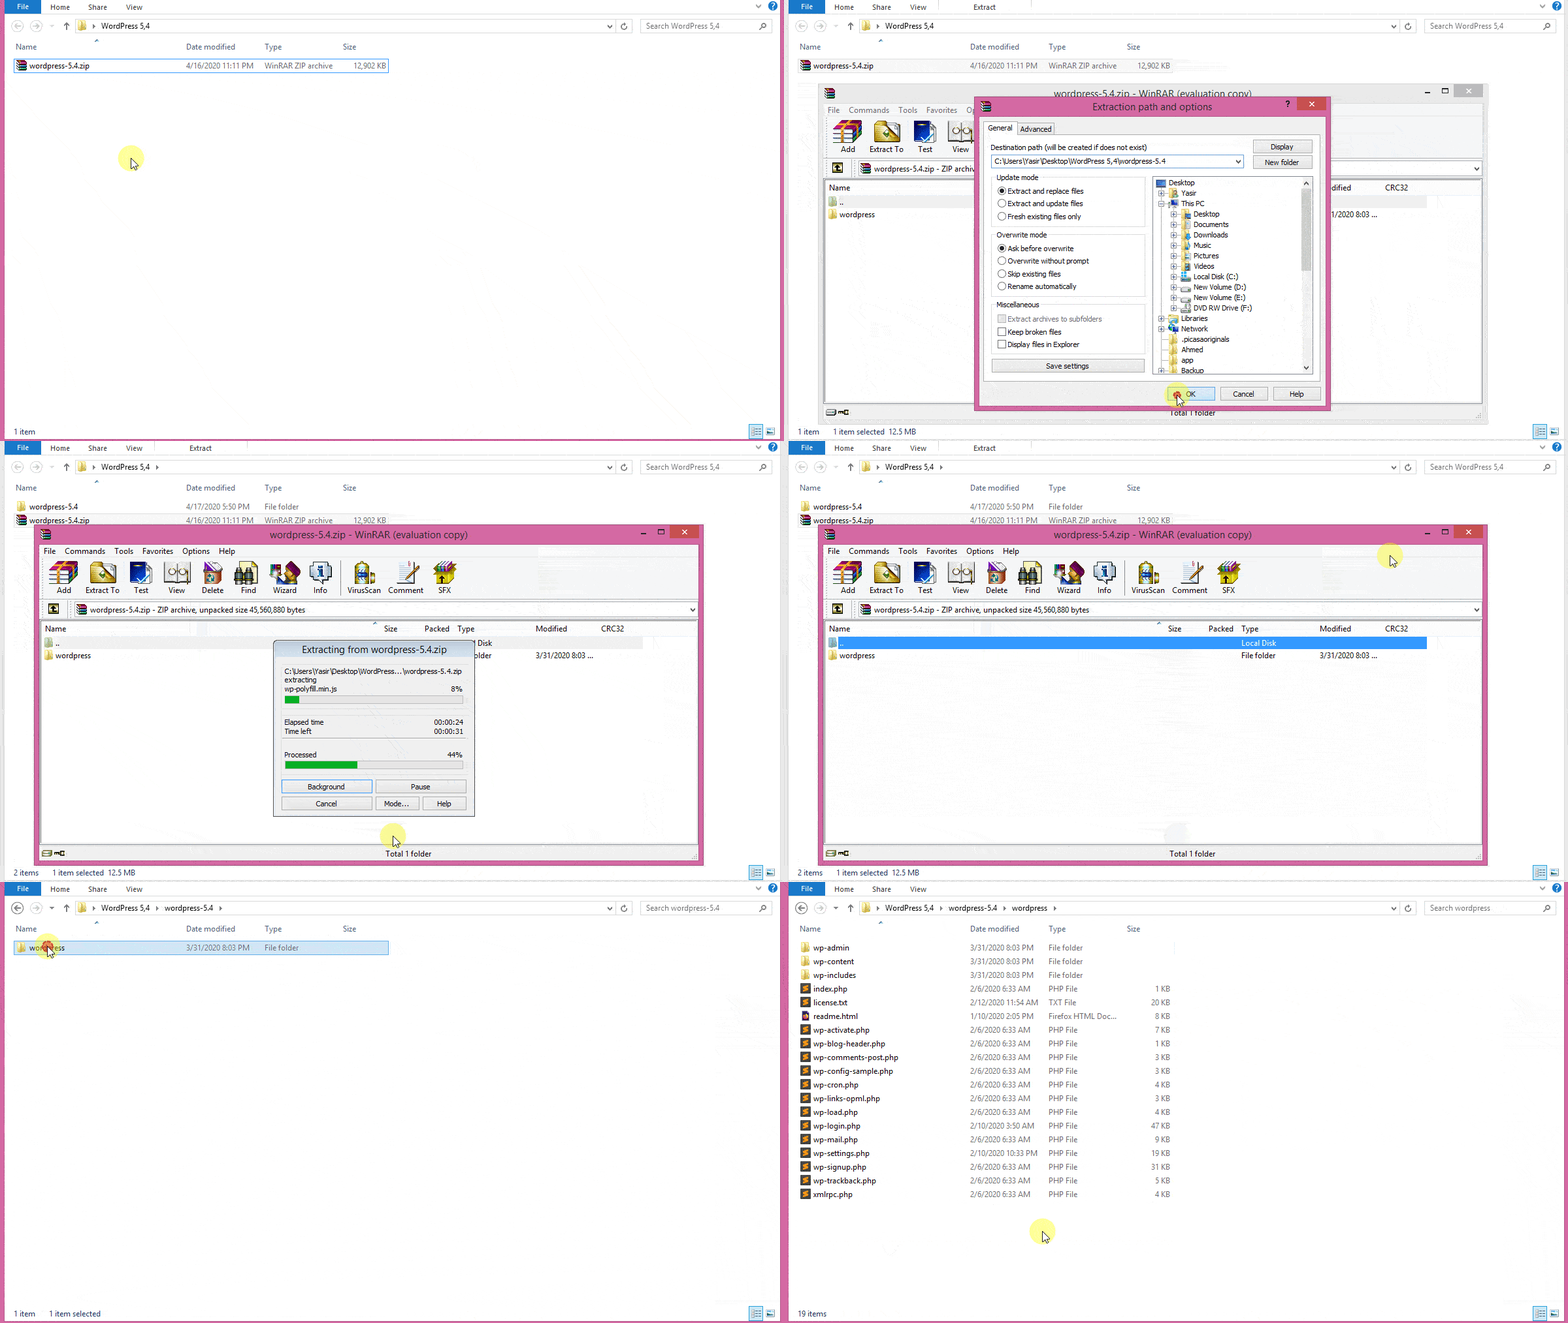
- Extract downloaded zip file on your computer. Now you’ll found a folder named “WordPress” that contains all the necessary files required for WordPress update using an FTP client.
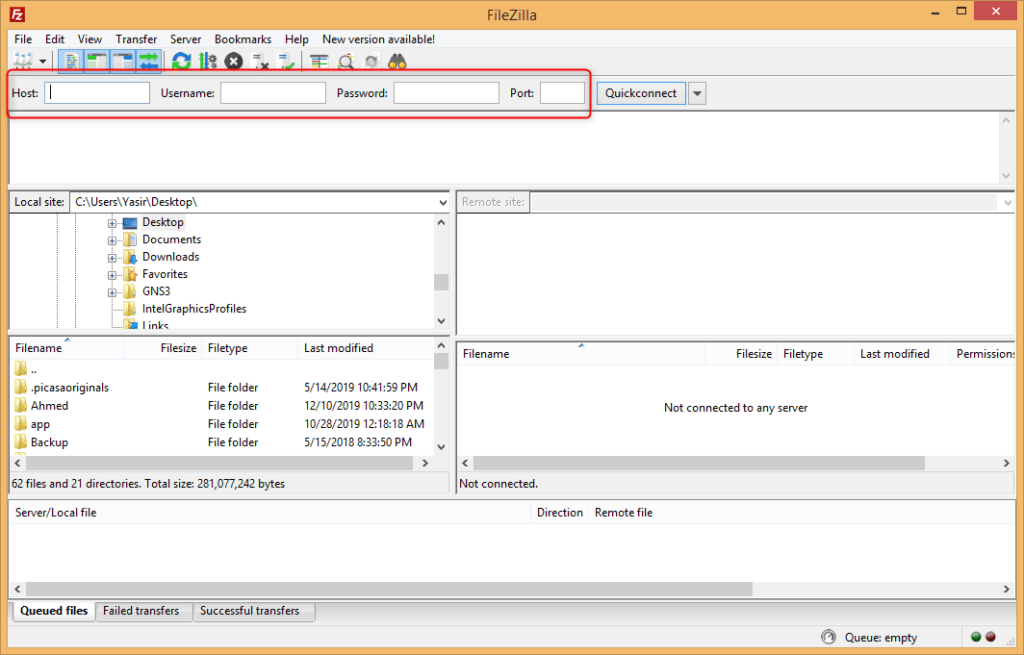
- Now you have to access your server through the FTP client. If you do not have FTP login details, either you can find it in your web hosting account or contact your hosting provider for more information. Open the FTP client on your system and connect to your website using the Host name, username, password, and port (21 in case of FTP) provided by your hosting provider.
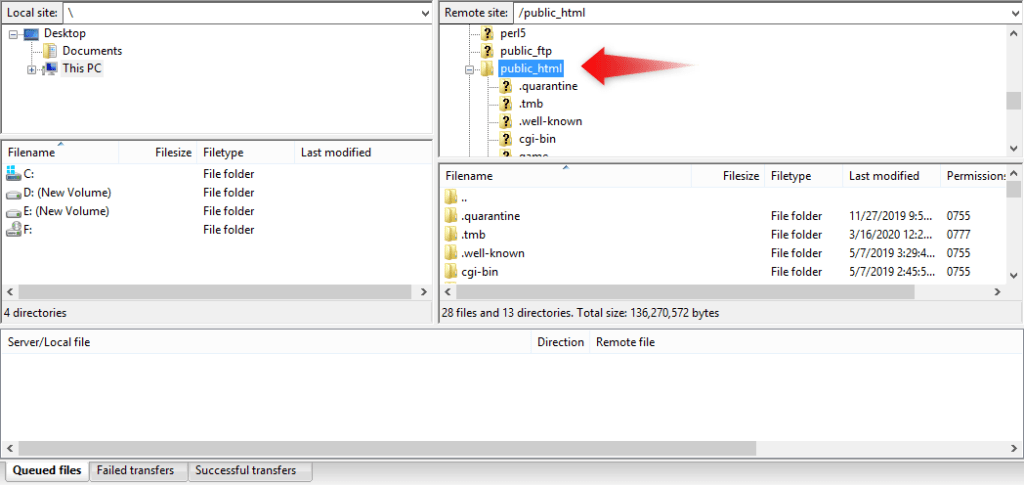
- Once connected, go to the document root directory of your website. For example, if there is only one domain on your web hosting server, then most probably, your WordPress website would be installed in the public_html folder.
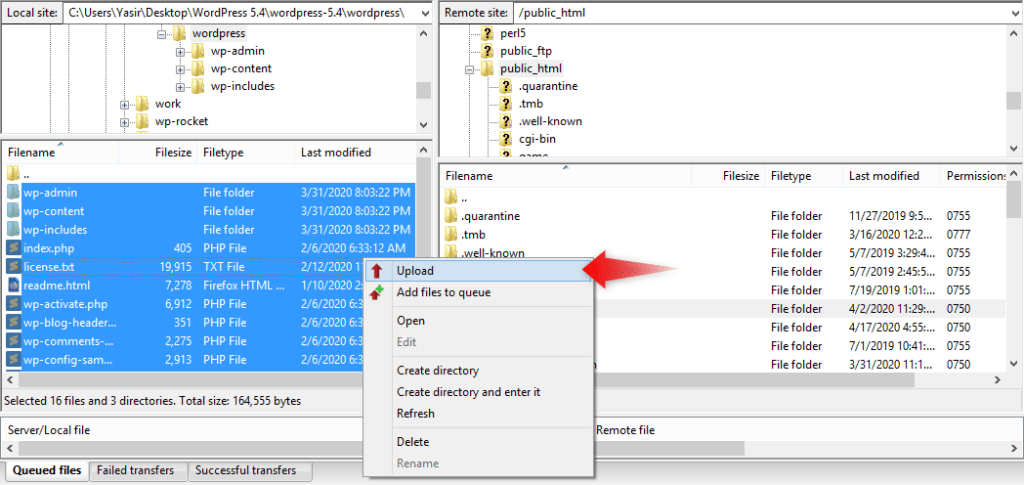
- In FTP client open the WordPress folder extracted from the zip file. Select all files inside this folder including wp-content folder (Read the Note Below) and then right-click and select “upload“.
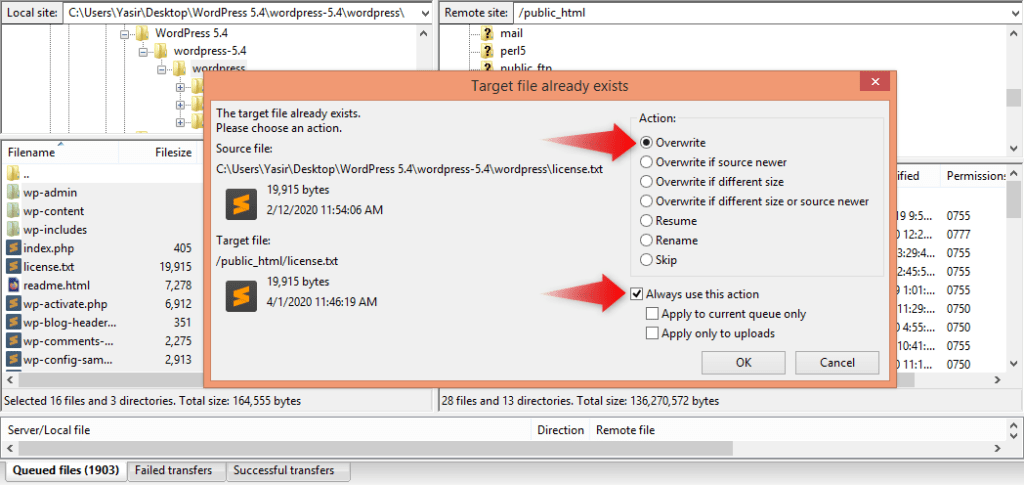
- A notification will appear as your website folder may contain older files and ask if you want to overwrite the already existing files. Select “Overwrite” and check the box next to “Always use this action” so that all the latest version files replace all previous files automatically and click on the “Ok” button.
Note: Including wp-content folder in the uploading process won’t affect the themes and plugins installed by you. Although, the files of themes and plugins that comes bundled with WordPress (Like Akismet Anti-Spam plugin, Twenty Twenty theme etc.) will get updated. You can totally skip the wp-content folder if you want.
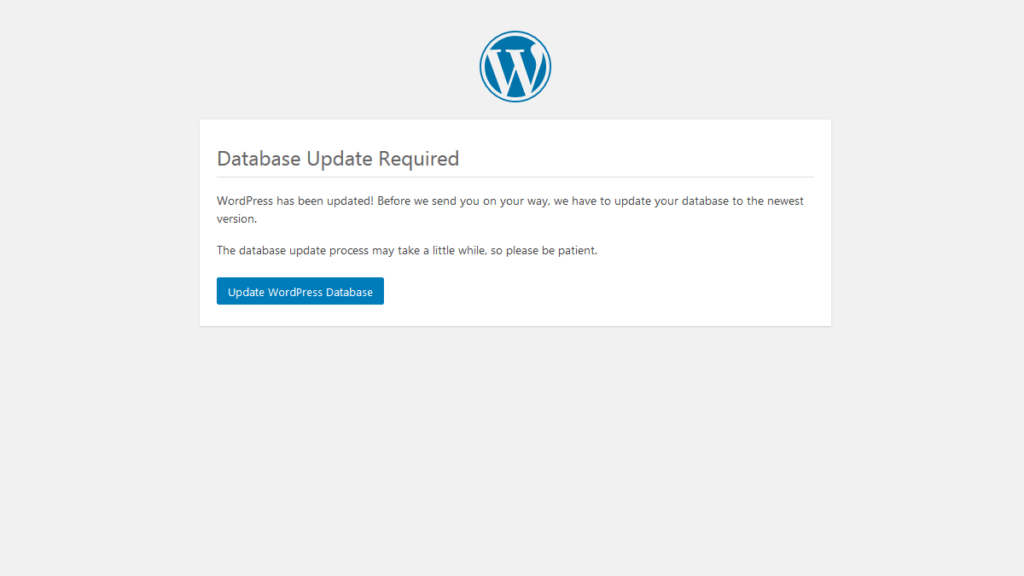
- Once the upload is done, go to the dashboard of your site to see if everything is working as expected. Sometimes the new version may also require a WordPress database update. If you see that database update is needed, click on the ‘Update WordPress Database’ button to continue.
That’s it. Now you’ve successfully updated your WordPress website manually. Do mention your views about this article in the comments section below.
Looking to add plugins to the WordPress website, see our Beginner to Expert level guide on How to Add Plugins to The WordPress website (5 methods).
Want to get WordPress and Web Hosting related video tutorials? Subscribe now to our YouTube channel. You can also follow us on Twitter and Facebook to get more tutorials, tips, How to guides, reviews and much more about WordPress and Web Hosting.
